How Overinflated Tires Actually Feel on the Road
Road bike tire pressure has gotten complicated with all the conflicting advice flying around. As someone who commutes year-round and has absolutely destroyed my hands chasing “pro-level” PSI numbers, I learned everything there is to know about what overinflated tires actually feel like. Today, I will share it all with you.
It was a Tuesday morning in Portland. I was running my Continental Grand Prix 5000s at 105 PSI — because I’d read somewhere that pros do exactly that — and three miles into my downtown commute, my teeth were chattering. Not from cold. From vibration.
That buzzing sensation travels up through the fork, through the handlebar stem, straight into your hands and jaw. On chip seal roads — those rough, slightly gravelly surfaces that dominate older neighborhoods — the tire just stops absorbing individual bumps. Instead of rolling over them, your bike skips. The front wheel bounces slightly, losing contact with the road for microseconds at a time. You feel every single one.
Then the handling shifts. Too much pressure shrinks the tire’s contact patch, so you’ve got less rubber touching asphalt. On a corner you’ve ridden a hundred times, the bike suddenly feels nervous. Your front end drifts wide — not dramatically, nothing catastrophic — but enough that you’re consciously steering instead of just flowing through. That hesitation is real. And it’s unsettling.
Riders hunting for road bike tire pressure too high signs often describe the front wheel as “darty.” Twitchy. You correct left and the bike overshoots. Correct right, overshoots again. That’s your reduced contact patch talking. Less rubber, less mechanical advantage, less trust between you and the road.
By mile 15, your hands are numb. Your lower back aches. You don’t feel fast — you feel punished. Maybe you gained 0.3 mph. You lost 30% of your comfort doing it. That trade doesn’t work on actual roads where potholes exist and chip seal is everywhere.
Why High Tire Pressure Hurts More Than It Helps
Most cyclists inherit a flawed belief: harder tire equals faster rolling. There’s a kernel of truth buried in there — wrapped in outdated testing. Yes, rolling resistance decreases as pressure increases. Up to a point. Exceed your optimal pressure window, though, and you start losing energy to vibration instead of gaining anything useful.
But what is that optimal window? In essence, it’s the pressure range where your tire can flex just enough to absorb road texture without going so soft it squirms. But it’s much more than that — it’s specific to your weight, your tire width, and the surface you’re riding on.
Think of it as impedance. Pressure too high for your weight and road surface means the tire can’t flex slightly to absorb micro-texture. That energy goes upward through your frame, through your body — wasted movement, not forward motion. You’re bouncing instead of rolling. The right pressure compresses and releases smoothly. An overinflated tire fights you the whole way.
Professional cyclists run lower pressures than most amateurs assume. A 140-pound pro on a 23mm tire might use 85–95 PSI, not the 130-plus that sidewalls suggest. They’re on closed circuits, freshly swept smooth pavement, and they’ve done the math obsessively. Your weekend ride is rougher. Your commute is rougher. Your optimal pressure is probably lower than you think — possibly by a lot.
How to Find Your Correct Tire Pressure by Weight and Tire Width
Here’s the reference you should bookmark. This table accounts for the two variables that actually matter: your weight, and the width of tire you’re running.
| Rider Weight | 23mm Tire | 25mm Tire | 28mm Tire | 32mm Tire |
|---|---|---|---|---|
| Under 140 lbs | 80–90 PSI | 75–85 PSI | 70–80 PSI | 65–75 PSI |
| 140–175 lbs | 90–100 PSI | 85–95 PSI | 80–90 PSI | 75–85 PSI |
| 175+ lbs | 100–110 PSI | 95–105 PSI | 90–100 PSI | 85–95 PSI |
Start at the middle of your range. Ride 20 miles. Still buzzing? Drop 3 PSI. Front wheel feeling vague and wandery? Add 2 PSI back. Iterate. Your body calibrates faster than any formula ever will — at least if you’re paying attention while you ride.
Quick rule of thumb: aim for 0.6 PSI per pound of body weight on 25mm tires. A 160-pound rider targets roughly 96 PSI. Adjust down 5 PSI for narrower tires, up 5 PSI for wider ones. Not gospel. Gets you close enough to fine-tune from there.
Adjusting Pressure for Terrain and Weather
That baseline assumes dry pavement and average road texture. Reality is messier. Always.
Wet roads — drop 5–8 PSI. Lower pressure widens the contact patch and adds grip exactly when you need it most. You lose nothing in speed. A 95 PSI baseline becomes 87–90 PSI the moment it starts raining. That’s what makes this adjustment endearing to us year-round riders — it costs nothing and genuinely works.
Rough pavement demands another 3–5 PSI reduction. Chip seal, potholed city streets, that one stretch of your commute that’s been “under construction” for three years — high pressure punishes you on all of it. The tire needs room to flex.
Gravel sections on a road bike? Drop to the lower end of your range. Not as aggressively as you would for actual gravel riding, but regular mixed-surface terrain rewards a more compliant tire. I’m apparently sensitive to surface texture changes and my Continental GP5000s work well here while my old Vittoria Corsas never quite did on mixed terrain.
Temperature shifts matter more than most riders realize. A 10-degree drop in ambient temperature reduces tire pressure by roughly 2 PSI. Pumped your tires at 70°F, riding them at 55°F? You’ve effectively gained 2 PSI without touching anything. Account for this on winter mornings — especially early starts.
Tubeless versus clincher is worth a quick note: tubeless tires can run 5–8 PSI lower than clinchers at equivalent rider weight. No tube means less drag and less heat buildup. Drop pressure without penalty. Solid reason to consider the swap if you haven’t already.
Quick Fixes and What to Check Before Every Ride
Probably should have opened with this section, honestly. The fastest way to stop chasing tire pressure mysteries is just to measure consistently.
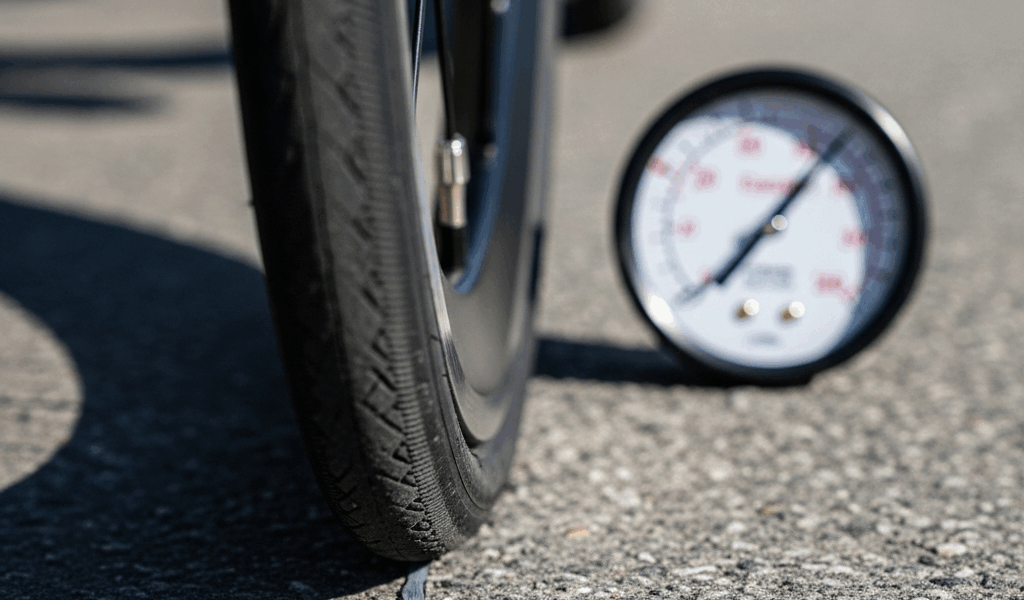
While you won’t need a professional shop setup, you will need a handful of actual tools. Get a floor pump with a gauge — not a hand pump, a floor pump. A Lezyne Steel Floor Drive runs $35–50. A Park Tool PFP-4 is around $80. Either one works. Accuracy matters here. Digital gauges on cheaper pumps drift over time; analog gauges on quality pumps stay reliable for years. Before every ride, attach the pump to each valve and note the PSI. Every ride. Temperature changes, slow leaks, and riding days all affect pressure more than you’d expect.
Check your tire sidewall. That number printed there — the one reading 120 PSI max — is not a target. It’s a ceiling. It represents the maximum pressure the tire can safely contain before structural failure becomes a real risk. Run 10–15 PSI below that mark. Always.
A floor pump might be the best option for home use, as tire pressure management requires precision. That is because even a 5 PSI variance changes how the bike handles — enough to feel it on the road but subtle enough to miss if you’re not looking for it.
Mid-ride realization that your pressure is too high? Stop. Bleed some air. Most floor pumps have a small release valve; carry a mini pump with the same feature on longer rides. A 5 PSI correction takes 30 seconds. Don’t make my mistake of grinding through 40 miles on over-inflated tires just because stopping felt like admitting defeat.
Tire pressure is the easiest performance lever you actually control. A decent pump, a gauge, and that table above will do more for your riding than any drivetrain upgrade you’re eyeing. Check the pressure, adjust, ride, feel the difference. That’s the whole framework. So, without further ado — go pump up your tires correctly.


Stay in the loop
Get the latest cyclingfan.org updates delivered to your inbox.